Do you want to create a website free of cost to make money online? We hope, your reply will be in yes. Also, you will say that who doesn’t want to make money online from a free website? Everybody wants. So in this blog tutorial, we will teach you how to create a website free of cost so that you may be able to generate an income with this free website. So, let’s start this informative blog tutorial.
Some important basics of free blogging
Before creating a blog website for free, you need to learn about the platform where you are going to create a website for free and make money with your free website.
The platform where you can create a free website
You may create your own website free of cost using Blogger. Also, by using our provided templates, your website will look like a professional website. Nobody will be able to understand that you have made this website using Blogger.
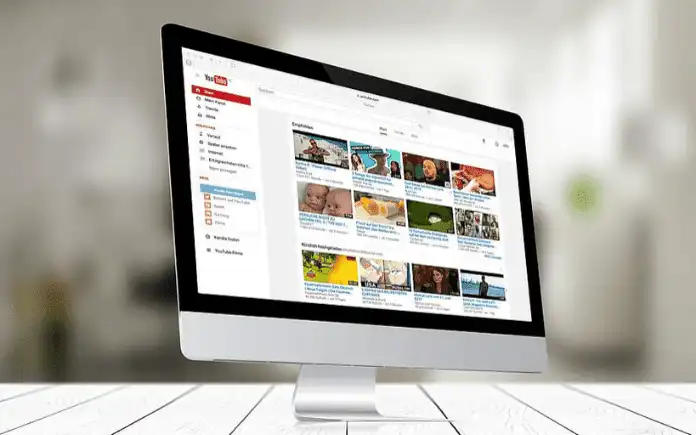
At first, you need to know that Blogger is a service of Google as much as like Youtube. But there is a difference between Blogger and YouTube. YouTube is a free video uploading platform and Blogger is a free blog post publishing platform.
Way of generating money from a free website
The way of generating money from the free website is as much as YouTube. You can write blogs on Blogger and monetize your blog with Google Adsense ads to make money from blogging.
Now we are going to make you understand the whole process step by step. When visitors search for any particular topic on Google search engine or any other search engines, search engines try to analyze the topic and show the top 10 results which are related to your topic and try to provide the information that may benefit a visitor.
Also, some relevant topics are suggested in the below of the search result. If your blog is on the visitors’ desired topic, then they will be able to find your blog through the search result.
If the visitors click on your link to read your blog post and along with Google AdSense ads are placed beside the blog post, then you will make money from the blog post for showing the advertisement of Google Adsense.
If someone clicks on the advertisement of Google Adsense, you will also generate money from the click. That’s how it works and it is the fastest ways to generate income. There are also more methods to make money from a blog. To learn about those methods, you may also read the blog post below.
So today you are going to learn how to create a website free of cost using Blogger so that you may be able to generate income with your free website. Follow the instructions below to create a website free of cost.
01. Sign in your Google account

To create a website on Blogger, at first visit on goole.com and click on the sign-in. Then using your email and password make sure that you are logged into your Google account.
02. Sign up in Blogger
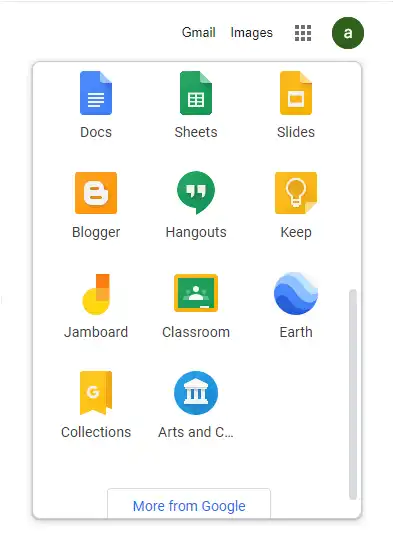
Then on the right top corner, you will see a Google apps bar. Click on the app bar, a pop up will be shown on the right top corner and scroll down. You will see the Blogger service of Google. Click on the Blogger icon, it will redirect you to a new page.
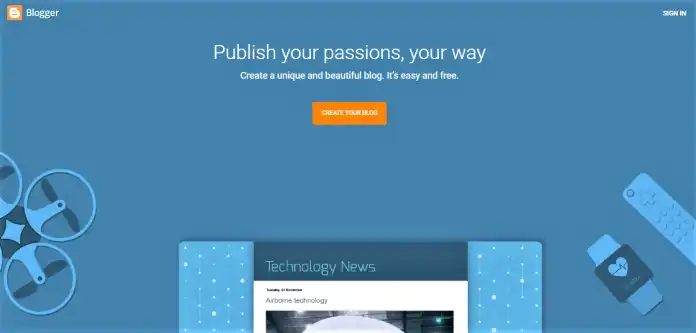
Click on the CREATE YOUR BLOG button. After clicking on the button, a pop up will appear.
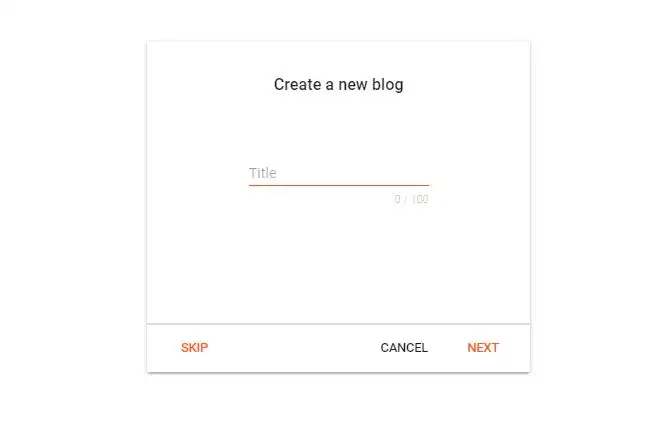
Submit your blog title into the title area. Here the title is regarded as the website name, make sure that your title name is appropriate. After writing the title name of your free blog website, click on NEXT.
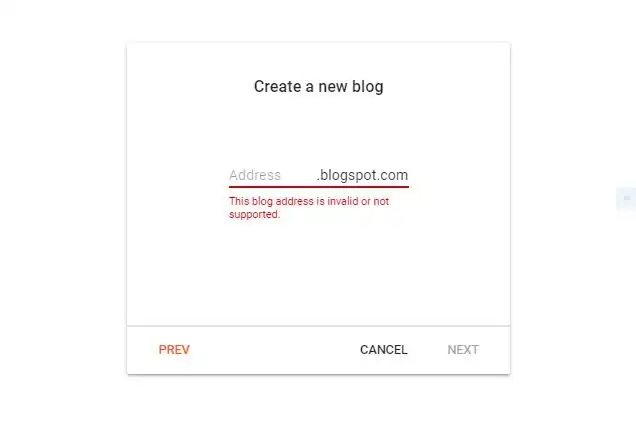
Now add a unique name of your website before .blogspot.com. After adding a unique name, click on NEXT.
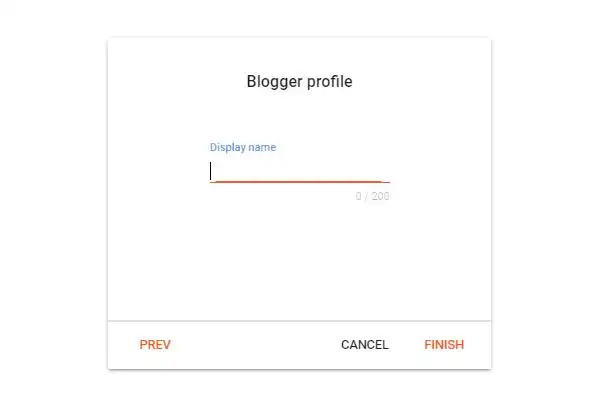
After clicking on NEXT, a new pop up will appear. Blogger will ask you to write your name into the Blogger profile field. The submitted name will be regarded as a display name. You will get your blogger profile link into the user setting area of Blogger. You will be able to change your display name later from the Setting. After writing your name into the field, click on FINISH.
03. Introduction to Blogger dashboard
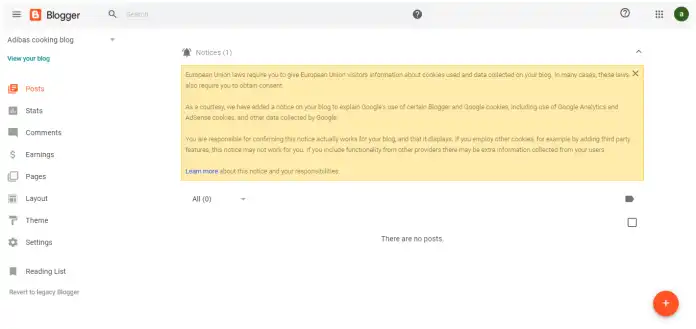
After clicking on the FINISH button, Blogger will redirect you to a new interface like the above image. By default, a notice will appear into the Blogger dashboard. Clicking on the cross button, you may cut the default notice. On the left, you will see some options are visible on your blog website. Now I will guide you with easy instructions on “How to use a Blogger menu properly?”
Posts:
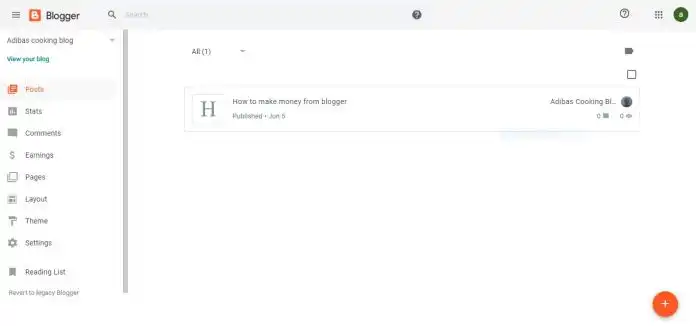
You will be able to create posts from here. To create a new post, simply click on the new post option from the menu. In the bottom, you will get a plus icon. Click on the plus icon, the post creating page will appear in front of you. You may add your post title in the title field and writings, images, HTML banner code in the description field. After adding the title, description and image, you may publish your post. That’s all you can do into the post menu.
States:
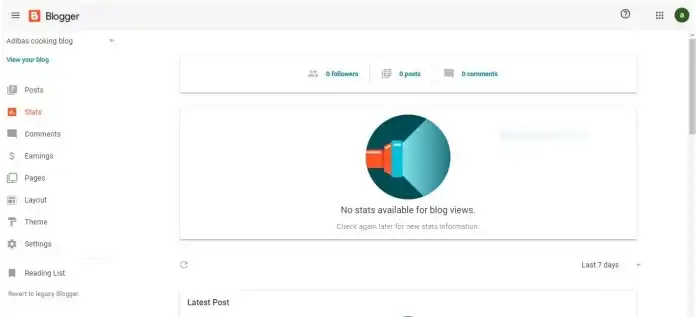
You will be able to check your blog traffic reports from here. The states section will show you the sources of traffic on your blog post. Also, you will find out how many followers and comments are you getting on your blog from here.
Comments:
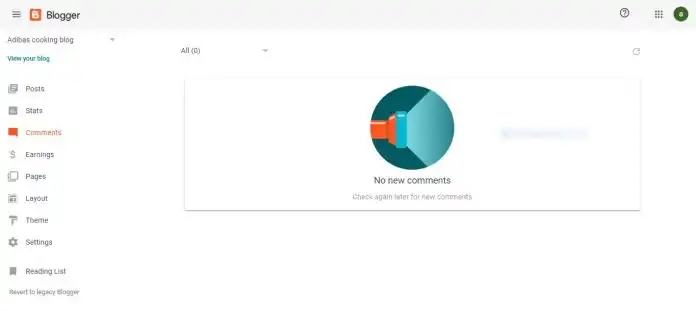
You may check your visitor’s comments and also reply to their comments from here. If you think that you will turn off the comment section for your visitors, then you may disable the comment section from setting menu of your Blogger dashboard account.
Earning:
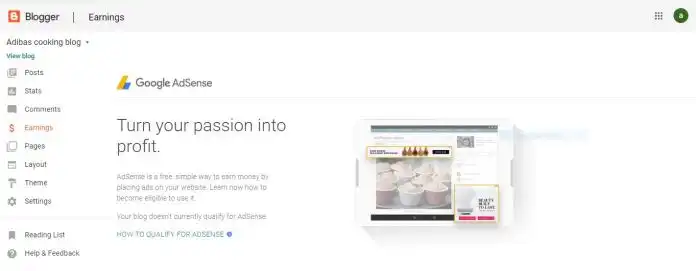
You can apply for an Adsense account from this option. If you are a new blogger, you won’t be able to apply for an Adsense account. Even if you try, you will see a text “HOW TO QUALIFY FOR ADSENSE”. You need to write at least 30-40 posts for making this text invisible and to be qualified for an Adsense account.
Pages:
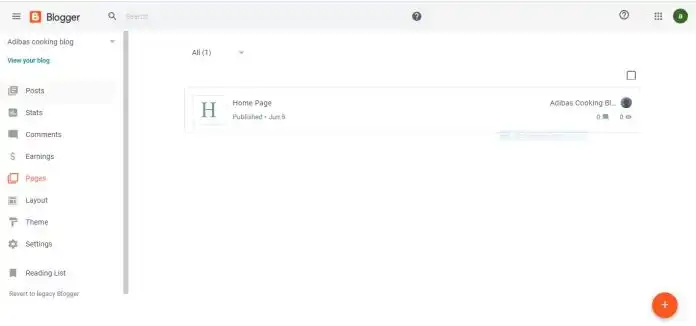
You can create pages for your blog website from here. You can design your web page with HTML code. You can add whatever you want into the web page.
Layout:
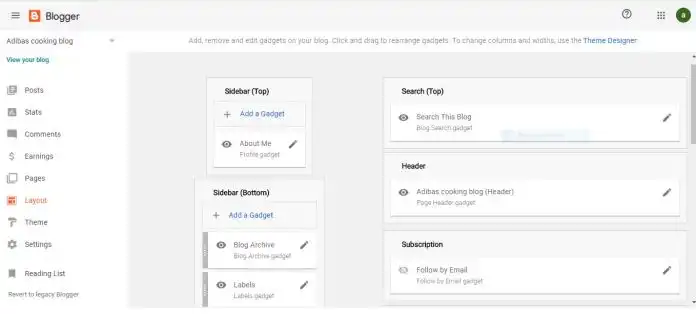
You may maintain so many features like creating a menu, adding a site logo and site icon, editing header gadget, editing sidebar gadget, adding a search bar and subscription box etc. I recommend you to edit your website layout after adding a new template in your theme editor.
Theme:
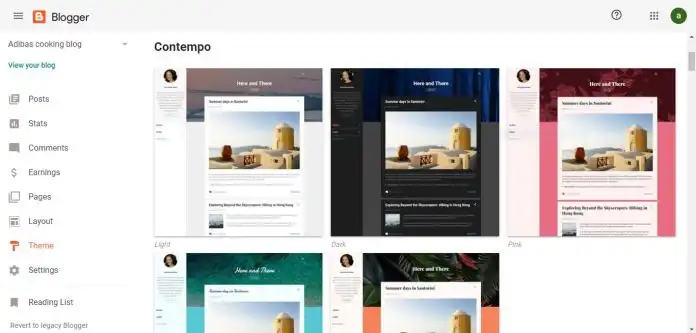
You can change your default theme from here and add a new premade theme from Blogger. But these themes are not so cool and not also SEO and user friendly. Don’t worry. I will provide you with some premium templates in the below. I will guide you with proper instruction on “How to use a premium template instead of premade Blogger template?.” So keep reading this blog. I will guide you on every step, you don’t need to worry about anything else. You may download the premium templates in the below totally for free.
I hope already you have downloaded your desired template. Now locate your cursor of the mouse on the zip file and extract the zip file by clicking on Extract Here.
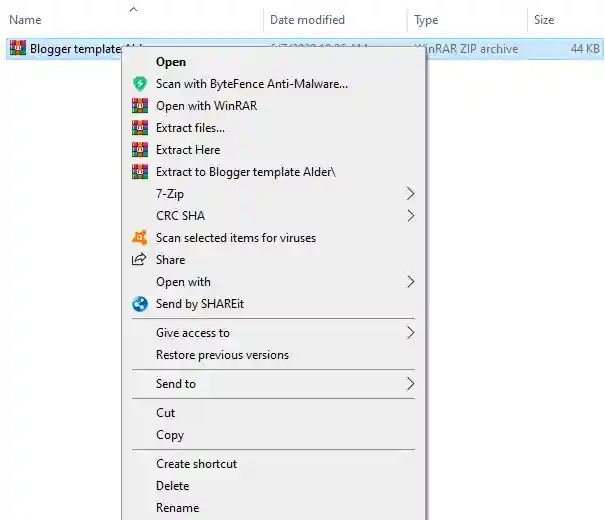
After extracting the zip file you will get a text document file like the above image.
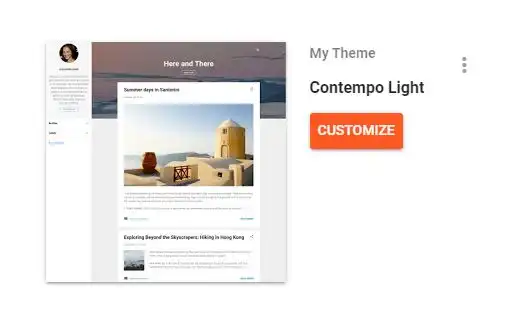
Now get back to Blogger dashboard and click on Theme. By default, a theme is already installed in your Blogger dashboard. I hope you are watching three-dotted theme editing navigation on the right corner. Now locate your cursor on the navigation bar and click on the right side of the mouse, you will be watching theme editing options.
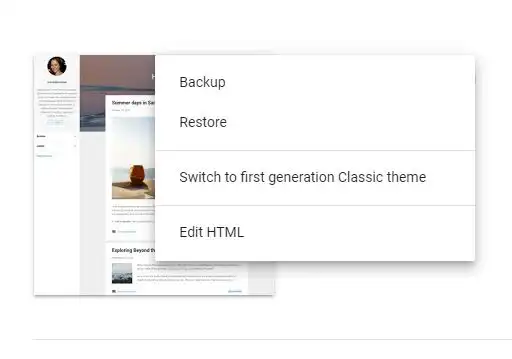
Like the above image, you have got a theme editing option. Now click on Edit HTML. It will take you to the theme editor.
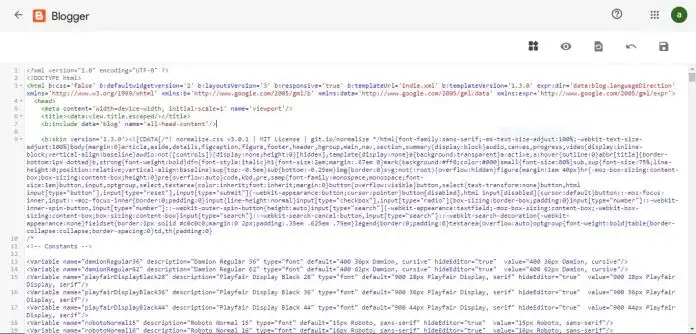
I hope you have got a page which is full of HTML codes. Now select all the HTML codes and delete the existing HTML codes. Minimize your browser screen and get back to the download folder where you extracted our suggested zipped template.

Open the text document and copy all the HTML codes. For copying all the HTML code, at first type Ctrl+A to select all the HTML codes and next type Ctrl+C to copy all the selected HTML codes.

Again get back to the theme editing page which was the minimized earlier on your browsers. Now paste all the copied HTML codes into the theme editor by typing Ctrl+V. And click on the save option which is located on the right corner of your theme editor. Now you are done. Your new theme template has been set up with your Blogspot website. Now visit your website, you will be watching that your previous template is gone. Your website is now a user-friendly website.
Already you have installed a new template on your Blogspot website. So get back to the layout option and edit your layout of your own.
Settings:
You can perform so may actions here like editing Blogger profile introduction, editing privacy setting, setting up a custom domain name, setting up HTTPS protocol, updating authors information, editing post numbers on per page, enabling or disabling meta tag, crawling and indexing your site, uploading Blogger profile photo and many more. I will guide you step by step in the below. So keep reading.
Basic setting:
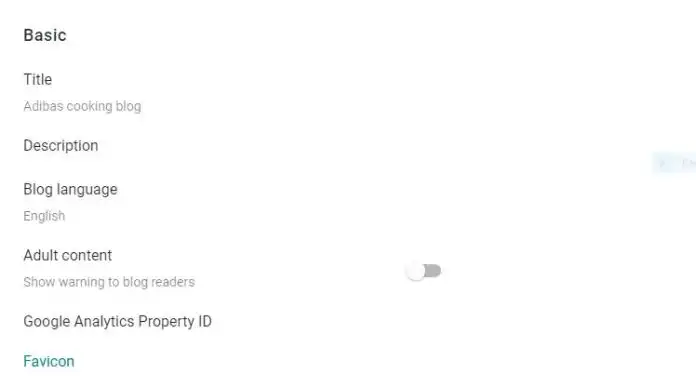
After clicking on the setting option, I hope you have got an interface like the above image. To configure the basic setting, put your title in the blank title field. Then add a short description for which purpose you have created this blog. Next, choose your desired language for this blog website.
Now leave rest of the fields empty except favicon. Now you need to add your site icon into the favicon option. If you don’t know how to create a site icon, then visit YouTube to learn about creating a site icon. You will get thousands of video on this topic.
I hope already you have a site icon. Upload the site icon in the Favicon field. And scroll down.
Privacy setting:

After scrolling down, you will get the Privacy setting. Make sure that your site is visible to search engines. If you see the green turn-on icon like the above image, then you don’t have to do anything. If it is turned off, then make sure that you have turned on this setting.
Publishing setting:
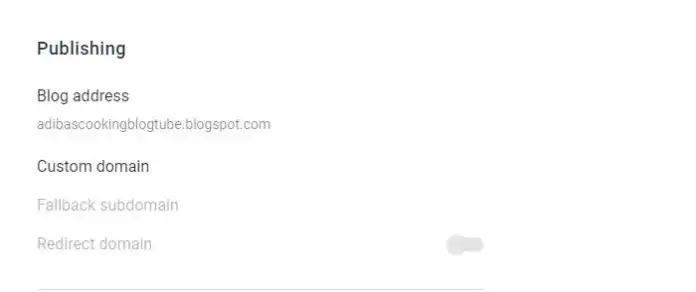
You may change your Blogspot Url from here and set up a custom domain for your Blogspot website. Now the question may come into mind that why I need to buy a domain name for youraddress.blogspot.com. Now think when you search on Google, did you ever find a URL like youraddress.blogspot.com on the first page. Your answer will be no. Even you don’t visit a website of Blogspot URL. You always try to visit the websites that have .com TLD.
So for the better user experience, you must purchase a domain name with .com TLD. A site with this type of domain name ranks fast on the search engines. You may also buy .org, .net, .in etc. These domains are also the top-level domains and rank well on the search engines. So it has become necessary to give your website a professional look with a domain name like .com, .org, .net and .in etc.
One more benefit you will get if you add TLD like .com, .org, .net and .in. The benefit is when you will apply for a Google Adsense ad account. Google will approve your website very fast. So you must purchase a domain name and set up the custom domain field.
To set up your custom domain name, you will have to purchase a top-level domain name. So I highly recommend you to buy a domain name from the company below because they provide the best and cheapest domain name. To find out and purchase a domain name for your website, you may visit Namecheap by clicking on the button below. You will be redirected to the official website of Namecheap. Purchase a domain name from there
To set up a custom domain name, you must buy a domain name from our recommended company. Otherwise, this section is not for you. Move on to the next section.
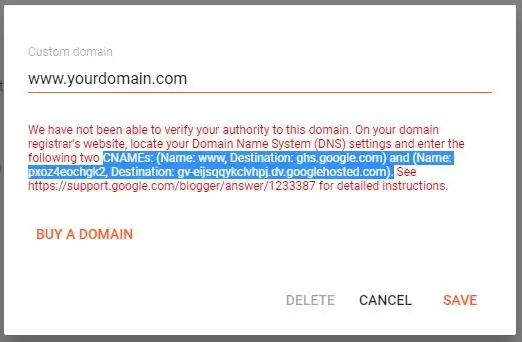
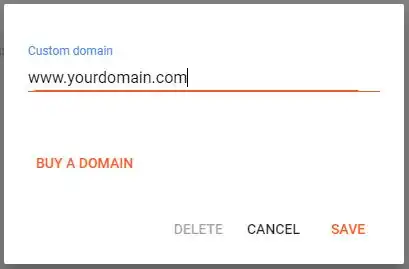
After clicking on the custom domain text, a popup will appear. Put your purchased domain name into the blank field and click on SAVE. But before clicking on the save button, make sure that you have only added www internet protocol at the beginning of your domain name.

Blogger will guide you with instruction on how to set up a DNS record. Also, you will get CNAME records which will be provided by Blogger. In the above image, marked blue text is the CNAME record. You will have to add these CNAME records into the DNS management system of your domain name.
So, get back to the Namecheap client dashboard. On the left corner, you will find a menu named on Domain List. Click on the Domain List. You will find your domain name.

After clicking on the domain name, you will get an option named on manage. Locate your mouse cursor on the manage button and click on it.
After clicking on the manage button, Advanced DNS setting will appear at the top. Click on Advanced DNS setting.

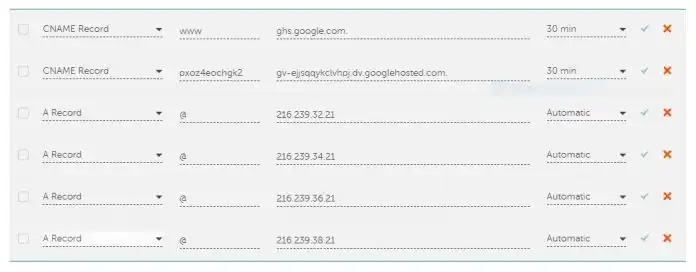
By default, your Advanced DNS will look like the above image. Now you will have to modify URL Redirect Record, Host and Value name of Advance DNS system management.

Your Advanced DNS record will look like the above image. Under URL Redirect Record, choose CNAME Record. At the place of host and value name, place Google provided CNAME records like the above image. And point Google IPs at the place of A record.
Google IPs: 216.239.32.21, 216.239.34.21, 216.239.36.21, 216.239.38.21
After adding all the information’s, on the right side click on all the save changes tick mark. Within 24 hours your custom domain name will be set up.
HTTPS setting:
Make sure that you have enabled your HTTPS like the above image. HTTPS means Hypertext Transfer Protocol Secure. It is used for providing secure communication over visitors computer. To attain visitors trustability, it is compulsory to enable.
Permissions setting:
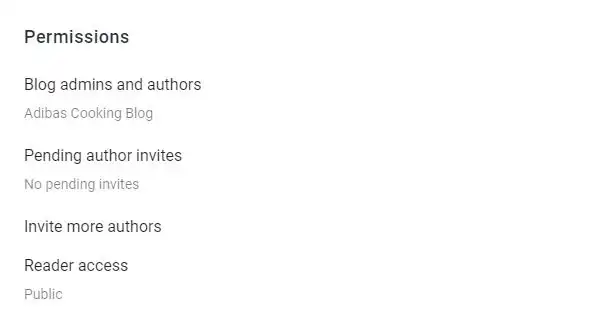
If you want to add multiple authors on your website, then this section is for you. You may invite authors and accept pending author invites on this section. Keep in mind that a user with the author role will be able to write, edit, publish and delete their own blog post on your website. Also, they will have permission on uploading files on your website. So before adding an author, make sure that the author is trustable.
Posts number setting:

By default limit of post numbers on the main page is set to 7. You may increase the limit of showing posts number on the front page from here. Keep in mind, increasing the limit of posts number may cause slow loading of the home page of your website.
Comments setting:
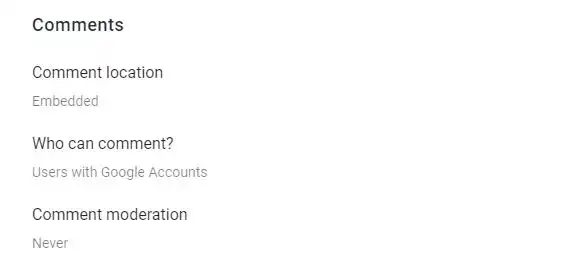
You don’t need to edit comments setting. Because by default, Blogger has made this setting suitable for you.
Formatting setting:
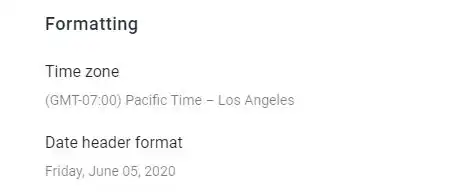
Using this setting section, you can change the timezone of your website. To change the time zone, click on the time zone link and set up the time zone of your region. Also, you will be able to change the date header format from here. But by default, it looks suitable.
Meta tags setting:

In the below, you will see Meta tags. Just enable it. If you enable this option, Google will show a meta description of your blog post from the first paragraph.
Crawlers and indexing setting:
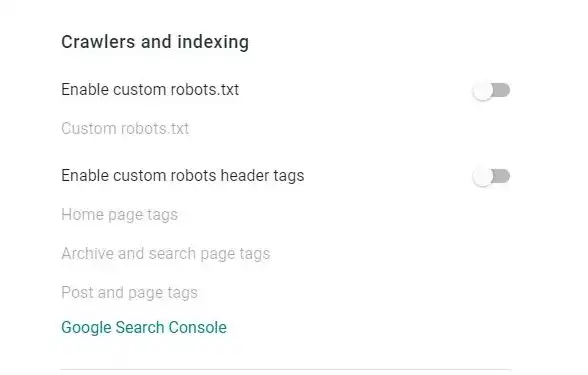
This is one of the most important settings that you need to configure. Because all types of indexing and crawling of your web pages and blog posts will depend on this setting. If your site is not crawled and indexed by search the engines, then people won’t be able to find your site on the search engine. So that’s why you will have to submit your website to Google Search Console. For submitting your website to be crawled on Google search engine, click on Google Search Console. You will be redirected to Google account sign in. Then sign in with your Gmail and password. After signing properly you will see an interface like the image below.
In the domain field, fill up your domain name. You don’t need to add any HTTPS or www at the beginning of the domain name. After adding your domain name, then click on continue. And that’s all. Now Google will start to index and crawl your site gradually.
Monetization setting:

After applying for an Adsense account if your application is approved by the Google Adsense team, then this setting is for you. You need to enable custom ads.txt and fill up the Custom ads.txt field with a text like this-
google.com, pub-xxxxxxxxxxxxxxxx, DIRECT, f08c47fec0942fa0
At the place of xxxxxxxxxxxxxxxx, you will have to put your own publisher ID. Now the question may come into mind, where will you get your publisher ID? To find out your publisher ID, login to your Google Adsense account.
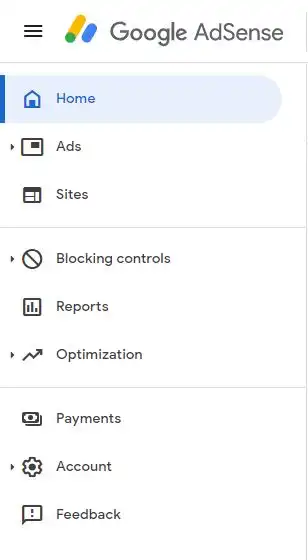
You will get a menu like the above the image. Click on Account. You will be able to find your publisher ID under the account menu. Now copy your publisher ID and place at the place of xxxxxxxxxxxxxxx. Then copy the whole text and place the text in the custom ads.txt field. That’s all.
Rest of the settings:
Rest of the settings are so easy to configure. Even a child can configure these settings. These settings contain uploading profile picture, Editing your contact information and additional information etc.

After configuring all the information, click on on the Save Profile button. That’s all. You are done.
Reading Lists:
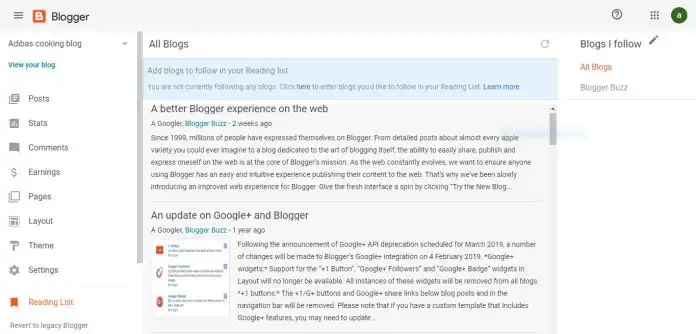
Under Reading List menu, you will get all the notification updates from the Blogger team. This is just a notification field to check any updates on Blogger.
Conclusion
Dear reader, we have come to the end of this informative blog post. I hope this blog post was helpful for you to learn about how to create a website free of cost. If you follow the above information and apply these methods properly, then I can guarantee you that your website will be responsive and mobile-friendly. If you liked this blog post and if the blog post has benefited you, then please don’t forget to leave your valuable rating about this blog post below.

